
You can find the filters on the product’s page from your online store. Their role is to help customers filter the products after specific criteria. Use this filter option to help your customers find the desired products quickly and simply.
To add filters, you first need to create attributes such as a List of options, Product variants and/or Options with multiple selections. See how to add Attributes HERE.
To configure the attributes that you want to use as filters in your store, go to the Products section, Filters options from the Main Menu and follow the steps below:
1. Add a filter
Step 1: After you access the Products section and Filters option from the Main Menu, you can choose from the drop-down menu the attributes you want to add as filters in your online store.

Step 2: After choosing the attribute from the drop-down menu, click on Enable Filter and repeat this action if you want to add more filter options. After adding all the attributes that you want to use as filters, you will have them displayed in a table, as in the example below.
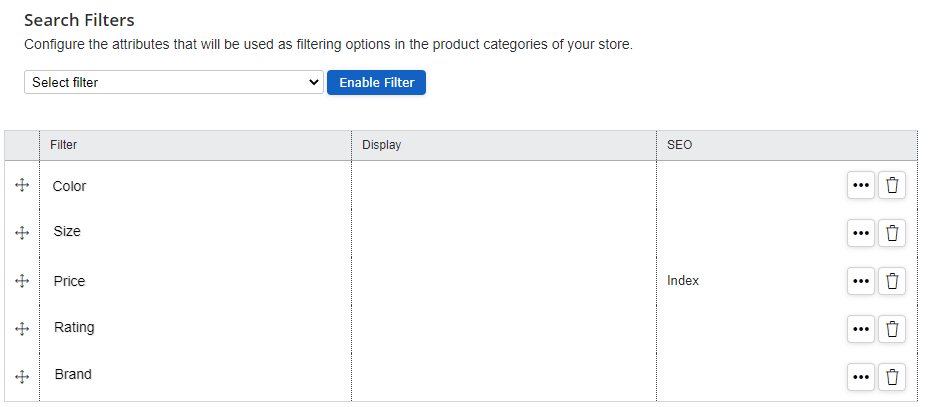
With this sign's help  , you can change how the filters are displayed on the products page.
2. Configure a filter
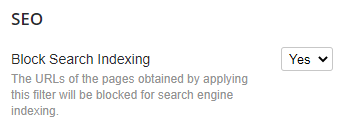
If you click on the three dots next to the filter, you will be prompted with a new page to choose if you want your filter to be indexed by search engines and set the display conditions.
In the Remove from indexing section, we recommend choosing" Yes" so that the search engines do not index this attribute.
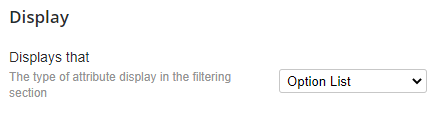
In the Display section, you can choose how to display the filters. You can display them as Option list, Image list, Option and image list.
In the Display Conditions section, you can choose that the options for this filter be available in product listings after applying a specific filter following the steps below:
Step 1: In the Display Conditions section, click on the arrow, open a drop-down menu, then choose the available option for the previously selected filter.
After choosing the option, you will be prompted with a table with the available options, from where you can select which filter to display based on the previously set filter.
Step 2: Click on  next to options and choose the options that you want to display.
Step 3: You can display all options or only the ones selected by you.
After choosing the desired options, don't forget to click on Select and then on Save.
Thus, on the product page for t-shirts, for example, only after you select the colour "red" you will have available the sizes for that colour: "s" and "m" if we follow the example below.
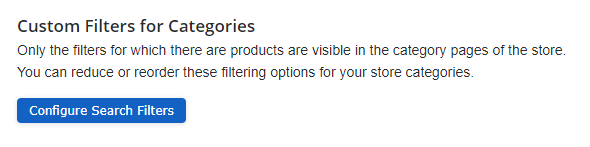
3. Custom filter
In your online store page categories, you have visible only the filters for which there are products. You can narrow down or reorder these filter options for the categories in your store with the help of customizable filters.
Step 1: Click on Configure Filter.
Step 2: Select the category in which the filter options will appear.
Step 3: Choose the Custom Filter option.
Step 4: Select the filter you want to be displayed in the selected page category and click on Add Filter. Repeat this action if you're going to add more filter options.
After adding the desired filters, you will be prompted with a table with all added filters to change their order as you like. Don’t forget to click on the Save button when you are done.
To return to Standard Filters, click on the three dots next to the custom filter and instead of Custom Filter, choose Standard Filters.
Comments
0 comments
Please sign in to leave a comment.