In the main menu, go to the Content section and choose the HelloBar option - here, you can create a new HelloBar, and you will be able to see and change the ones created previously.
Create HelloBar
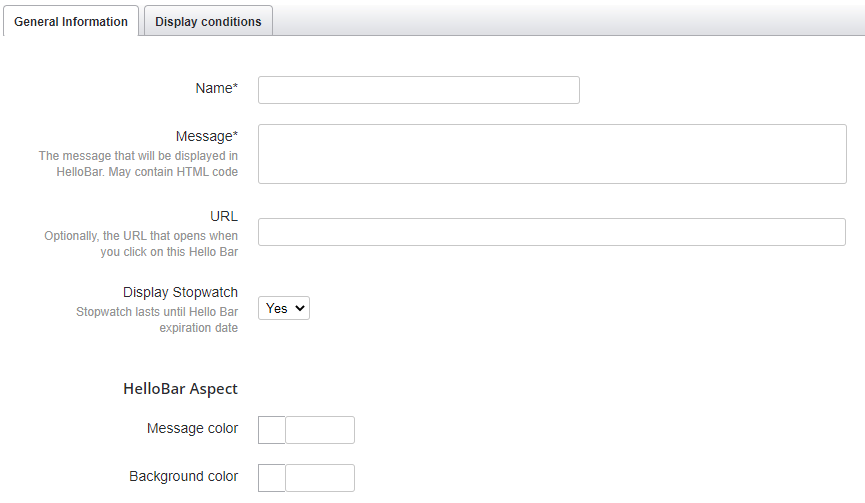
Click on the Create HelloBar button and enter the following General Information:
- Name - Add a name for this HelloBar, which will only be visible in the administration area for information purposes.
- Message - Enter the text or the HTML code which will be displayed in your store’s HelloBar.
- URL - Enter the page’s link that will open when you click on the HelloBar.
- Display stopwatch - Choose if you want to display after you’ve entered a message a stopwatch on the HelloBar (you can choose the time interval in the next tab).
- Message colour - Choose the text colour for your HelloBar.
- Background colour - Choose the colour for your HelloBar.

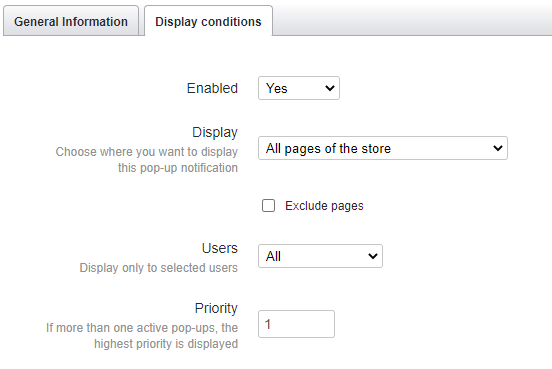
Now, choose the Display conditions for your HelloBar:
- Enabled - Choose if you want to display this HelloBar in your store, or the beginning and the end of the display time interval.
- Display - Choose where you want to display the HelloBar when enabled.
- Users - Choose if you want to display the HelloBar only to logged in / anonymous users.
- Priority - Choose the display order of the HelloBar.
If you have created several HelloBars, only the one with the highest priority will be displayed in the store.

After you enter all information, you can save your HelloBar if you click on the top-right's Save button.
Comments
0 comments
Article is closed for comments.