Once the app is enabled, you can find the Price Increases option in the main menu, Marketing section. Here you can configure price increases rules but also the rules you have created.
Create a new price increase
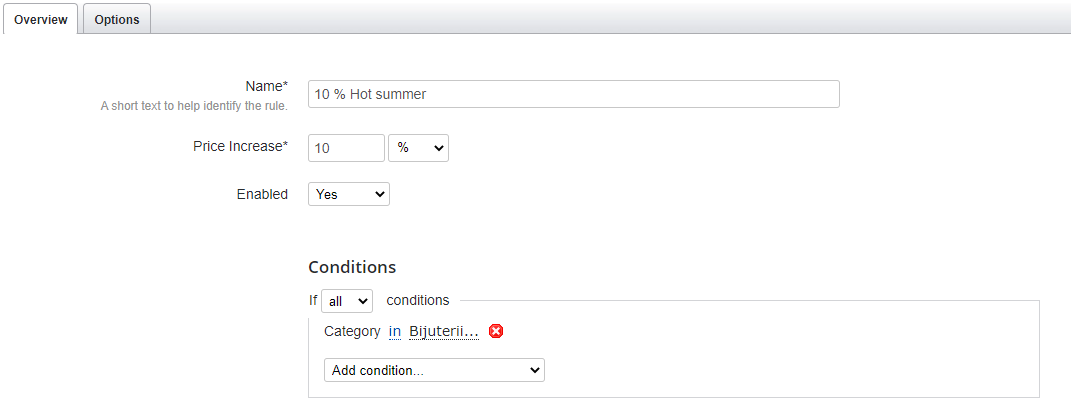
1. Go to the main menu, Marketing section and Price increases option. Here, click on the Create Price Increase button and enter an Overview for the addon.
2. Enter a Name for the addon to help you identify it in the future.
3. Set the Price increase value - a percentage of the full price or a fixed amount.
4. Choose if you want to Enable the addon or if you want to make it available in a specific time interval.
5. Choose the Conditions in which you want to apply the addon to the products, following these steps:
- Choose if “all” or “any” of the conditions you are about to add are met.
- Choose the condition which can refer to product (code, price, inventory, brand, etc.), a product attribute (if you have set attributes), customer (for example, his surname) or sales channels (for example, eMAG Marketplace).
- Choose a variable between equals, greater than or equal to, less than or equal to, greater than, lesser than, not equals, in, not it.
- Check and fill in the interval for which the condition applies.

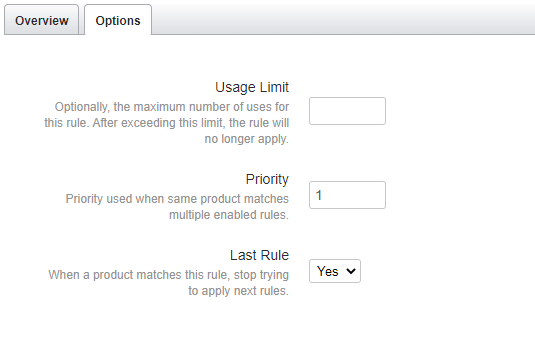
6. Options you can set:
- Usage Limit - Fill in this field if you want to apply the addon to only a limited number of customers.
- Priority - Choose the order in which the rules apply to the products; if you have selected two separate rules, the rule with a higher priority will apply.
- Ignore the following rules - Choose “Yes” if you want to ignore all the following rules (based on priority).

Comments
0 comments
Article is closed for comments.